Object Repository is a place where you can store your objects in Katalon studio. Objects in Katalon Studio include Web Test Object, Web Service Object, and Mobile Test Object. For today we are going to take a look at Web Test Object and how we can get the objects from web elements using Spy Tool, which is a UI based selector, and getting it directly from the web page. I think it’s important to know how to do both, and I will discuss what I think to be the advantage and disadvantages of each method.
How to use Spy Web
Spy Web and Spy Web Recorder are tools provided by Katalon Studio to help the tester to select element without any coding. Spy Web is used to select specific elements to save as an Object in Katalon Studio. To use, we can find the Spy Web icon at the upper left side of Katalon Studio as seen in the screenshot below, then a small window will appear. Here we can input the URL of our website, and click the chrome icon (if using chromedriver) to start.

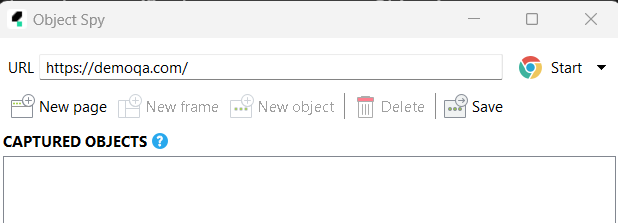
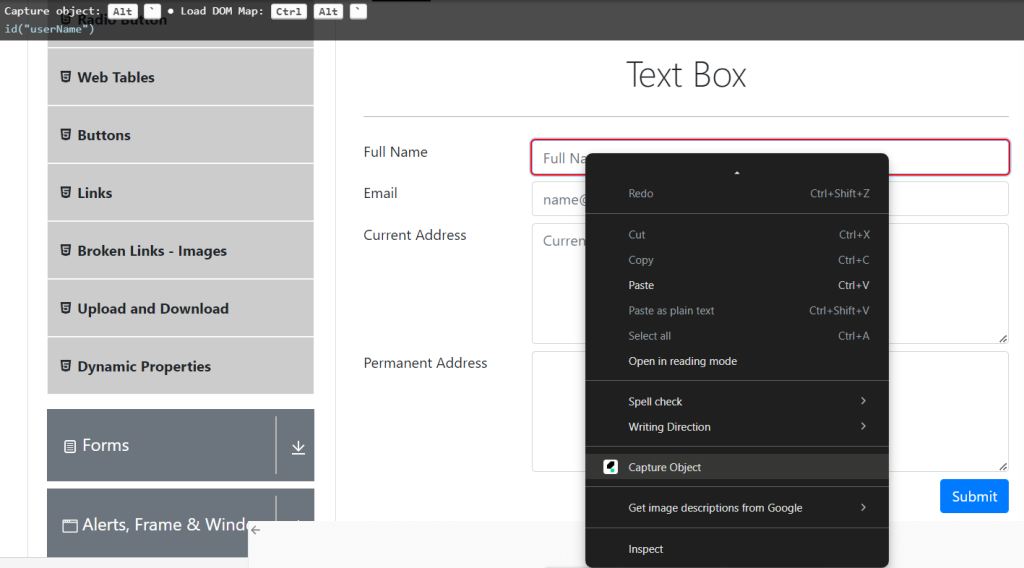
Now the Chrome browser should automatically start and navigate to our URL. And we can hover on the element we want to select, it will be highlighted in red, then hit CTRL + ` (the button under your escape button) to select, or you can right click and select “Capture Object”. This will select the element and we can see the selected element in the small Spy Web window. In the Spy Web window, we can see the XPath and other attributes from the element we have selected. From here we can click “Save”, select the directory we want to save the Objects in, and click “OK”. From here we can find the saved Objects, and tidy things up by renaming the Objects and folders.


How to use Spy Web Record
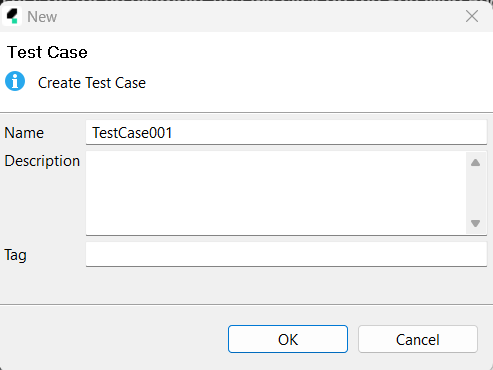
Spy Web Recorder is another tool provided by Katalon Studio to select web elements, but instead of selecting specific element one by one, it actually records the activities we do and recording it as test steps. Let’s go for an example, first we click on the Spy Web Recorder at the upper left of the screen, then input our URL, and click the Chrome icon to start recording our steps in chrome. For this example, I am going to use the Spy Web Recorder on this website. Now we can click on the textbox, and it will select the textbox, and also record the “click” activities. We can go ahead and proceed to set text into our textbox. Once everything is recorded, we can click button “Save Script”, choose which folder to save our objects and click “OK”. Then give a name for your Test Case and click “OK”. Now we can see our Objects are being saved (don’t forget to rename the Objects and folders to tidy things up). And we can also see the steps were conveniently recorded into our Test Case


Pros & Cons of using Spy Web and Spy Web Recorder
Some Pros of using Spy Web and Spy Web Recorder
- Easy to use without any coding
- Relatively fast
- Can help the tester to select specific element that’s hard to take manually
Some Cons of using Spy Web and Spy Web Recorder
- Less flexible. It is harder to parameterize objects and work with variables
- Not effective when dealing with dynamic web elements (some of the web element’s attributes keep changing)
How to get Web Test Object manually from directly inspecting the Website
To get our Web Test Object manually, we can navigate to our URL in our browser, right click on the page and select “Inspect”. I am going to select the same element we have selected before. Here we can find the Element window with all of our elements in this web page. Click on the “Select” icon (one I have highlighted in red in the screenshot below) and click on the element we want to select. On the right side, we can see that our selected element is being highlighted. It is an “input” element and contains the attributes, such as placeholder, type. id, and class.

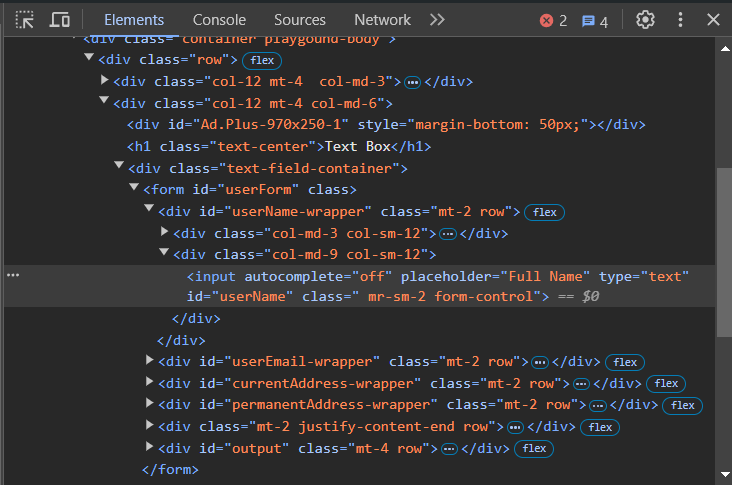
To select the element we decide which attribute is making this element unique. So we can try:
//input[@id='userName']
I usually press CTRL + “F”, to search on the element tab, and type in my XPath selector to make sure I get the correct element. From the screenshot below, we can see that we have successfully select our element. The “1 of 1” on the bottom right, indicates that our XPath is only directing to the correct element only. We want to make sure that our selected element is unique.

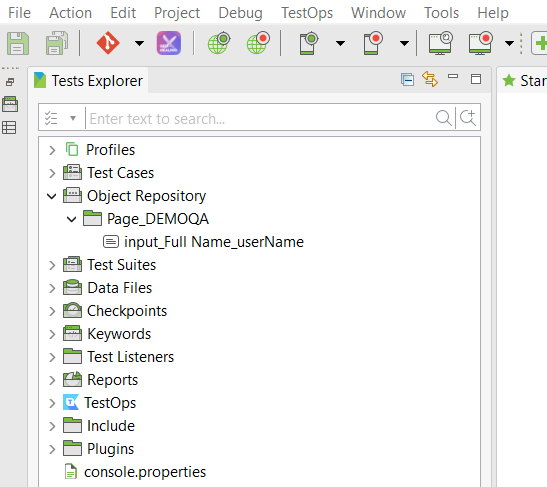
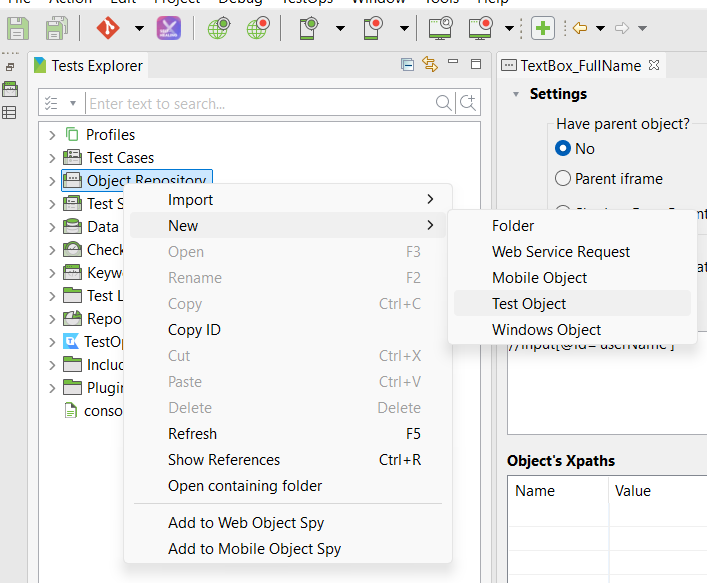
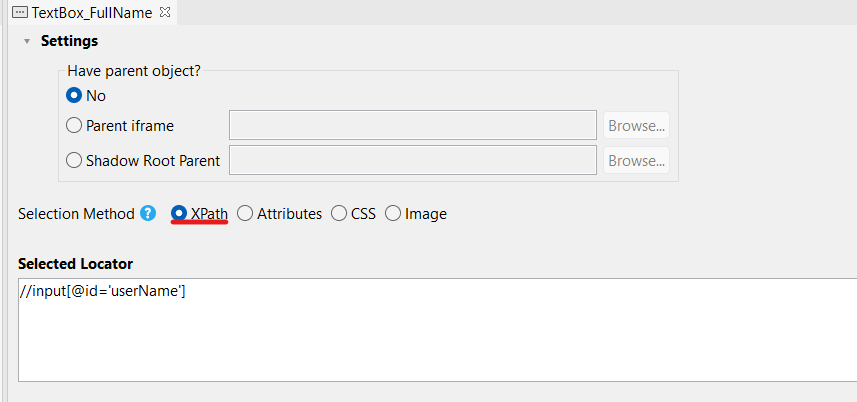
From here we can go back to our Katalon Studio, and to our Object Repository folder. Right click and choose “New” > “Test Object”. Give our object a name, for example “Textbox_FullName”. Click on the radio button “XPath”, and paste our custom XPath under “Selected Locator”. Then press CTRL + “S” to save the object.
Pros & Cons of manually selecting the elements
For now we can see that manually selecting the elements is a bit more complicated than using Spy Web tools. So why do we want to take the extra steps? Here are some Pros and Cons:
Pros of manually selecting elements:
- More control of the object you are choosing.
- More flexible with your object. You can parameterize your XPath so that when you call on the object, you can put some values into it and make it more flexible.
- More effective for dealing with dynamic elements.
Cons of manually selecting element:
- More complicated and takes a while to practice.
- Harder to take if cannot be selected by the selection tool.
For more in-depth into the manual selection of elements, you may find it on this blog post: click here!