There will come a time when doing automation when we have to parameterize our Test Objects. Either to make our Test Object more flexible or because we want to integrate data into our Test Objects. In this blog I want to share how to create a parameterized Test Object, and how to call the Object in Test Case. This means we can use variables in our Test Object and when we call on the Object, we can throw in the values we want.
Create a Parameter in Web Test Object and Calling it in a Test Case
To create a parameterized Web Test Object, first we need to have selected the web element and save it in the Object Repository folder as a Test Object. For example, in this page I have selected the cell “Cierra” using XPath:
//div[text()='Cierra']
And save it in the Object Repository as a Test Object.
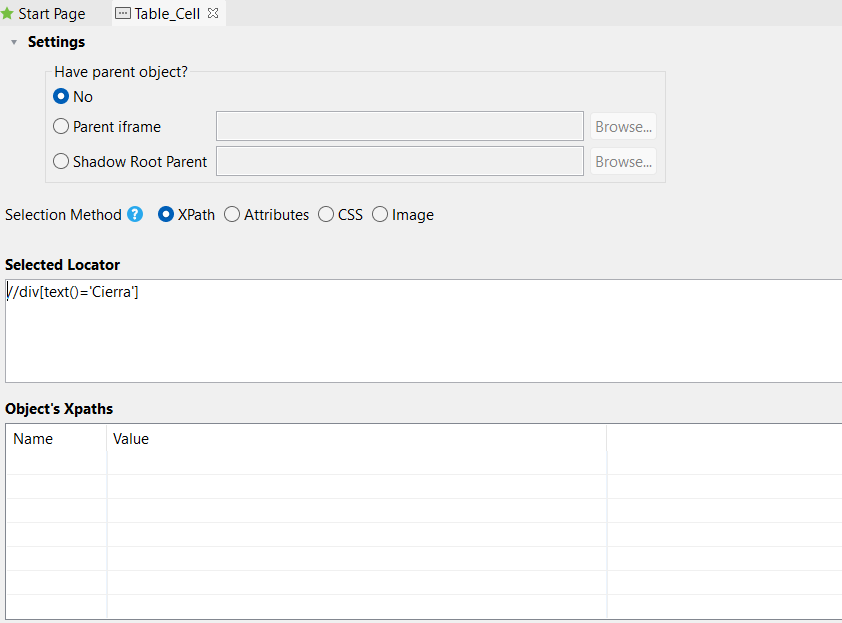
Now to parameterize this object, we have to modify the XPath and put “${variableName}” on our object. This syntax is important, in case you want to parameterize anything. For example in our case it would be:
//div[text()='${CellData}']
The single quotes mean that the value should be a String, and the name of our variable in this case is “CellData”. Now it’s time to call our object in a Test Case and see if we can give it value and verify if a cell value “Cierra” exists. Here’s how to do that, in the Test Case script view:
WebUI.openBrowser('<https://demoqa.com/webtables>')

WebUI.maximizeWindow()

WebUI.verifyElementPresent(findTestObject('Table_Cell', [('CellData') : 'Cierra']), 2)
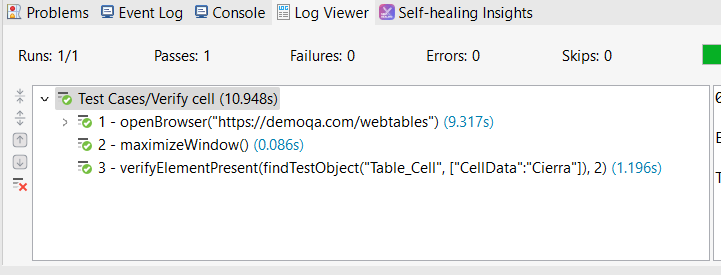
In the Test Case, when calling the Test Object, we can throw in the value “Cierra” so that it will try to find a cell with the value “Cierra”.
Example of Integrating Data into a Parameterized Web Test Object
In a Test Case we can try to declare an Array that has cell data we want to verify. Then make a for loop to loop through our Array and verify if the element is present.
WebUI.openBrowser('<https://demoqa.com/webtables>')

WebUI.maximizeWindow()

String[] CellData= ['Cierra', 'Vega', '39', 'Email', 'cierra@example.com', '10000', 'Insurance']

for(int i=0; i < CellData.size(); i++) {
	WebUI.verifyElementPresent(findTestObject('Table_Cell', [('CellData') : CellData[i]]), 2)
}
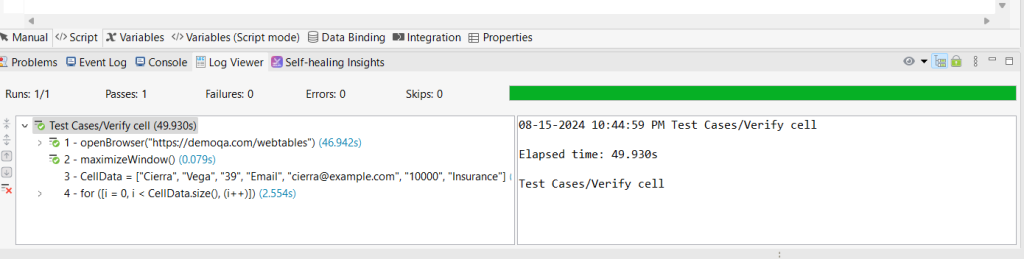
From this example, we can see how flexible it is to use a parameterized test object with for loops, if statements, or other data we want to implement. Even though this example is pretty basic, I hope it can help you tackle a more advanced challenge.
How to Have More Than One Parameter in a Test Object
What if we want to have more than one parameter in our Test Object? We can certainly do that in Katalon Studio. For example for this XPath below:
//div[@class='rt-td' and text()='Cierra']
We can parameterize it by switching the values into “${variableName}”, so this turns into:
//div[@class='${className}' and text()='${CellData}']
To call this Test Object in our Test Case, we should throw in two variables. Example of doing that, we can do:
WebUI.verifyElementPresent(findTestObject('Table_Cell', [('className') : 'rt-td', ('CellData') : 'Cierra']), 2)